
Managing image resources is an aspect that engineers often overlook. If we don’t pay enough attention, it will not only impact our app’s performance but also our productivity.
In this article, I will show you some effective strategies that our engineering team is using to manage image resources. Applying these strategies to your project can help to reduce app size, reduce memory footprint, and enhance performance for your application.
Let’s get started!
Table of Contents
- PDF or PNG?
- Compress assets
- Image Downsampling
- Remove duplicate assets
- Remove unused assets
1. PDF or PNG?
#1. Choose PNG format over PDF format.
In my previous project, the team used PDF format for all images. The main reasons are:
- Easy to maintain: We only need to maintain 1 PDF image instead of 3 PNG images (1x, 2x, 3x).
- Xcode supports Preserve Vector Data for PDF format.
However, PDF images are heavier than PNG images.
Before Xcode 15, when archived, Xcode will translate your PDF image to 3 PNG images. Starting from Xcode 15, Xcode will translate your PDF image to 3 PDF images when archived. Then, it will use App thinning to eliminate unnecessary resources.
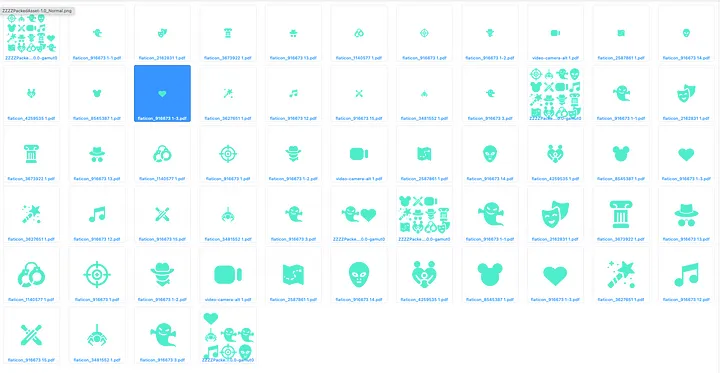
The following image is the “Assets.car” file after I archived my example project. You will see that each PDF image will be generated into 3 PDF images:
Now, let’s compare the “Asset.car” file size between using PNG images vs using PDF images:

The “Assets.car” size in the project that uses PNG images is much smaller than using PDF images
Suggestions:
- Use PNG format for your images to have better app size and better performance.
- Use PDF format for images that need to be preserved vector data to support scaling it in different view frames.
2. Compress images
#2. Compress your images if possible before embed into the project.
The 2nd tip to reduce the app size is to compress your images before adding them to your project.
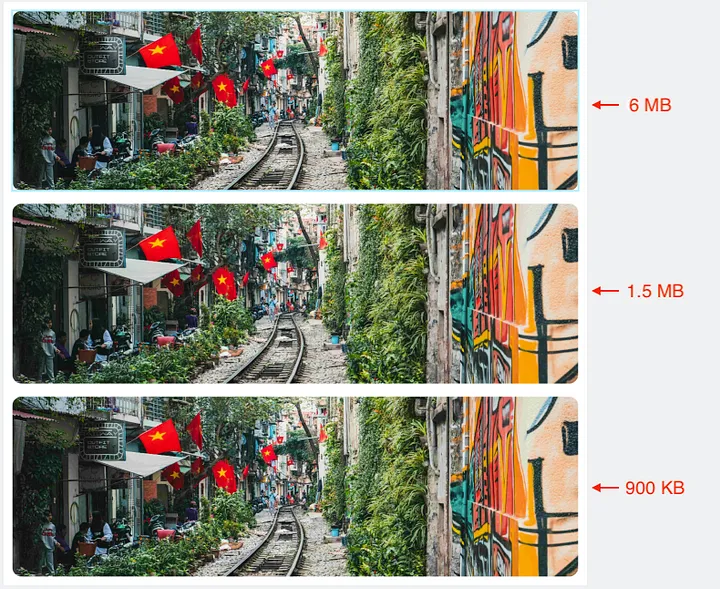
Let’s take a look at the following images. After compressing it a few times, the image size decreased by 83%, but you can hardly notice any quality difference (especially on the iPhone screen). Considering what the images are being used for can help you decide on an optimal compression setting for your app.
Suggestions:
- Use TinyImage Compressor — a Figma plugin tool that helps export compressed images directly from Figma.
- In our large engineering team, we have hundreds of icons. To manage their size, we add a script to the pre-commit hook workflow. It verifies the size of the newly added icon exceeds 100 KB. If so, it asks the engineer to compress it.
3. Image Downsampling
#3. Use the image that has size matches with your UIImageView size.
Problems
Don’t blindly use any image without considering its size. A reminder from WWDC 2018:
Memory use is related to the dimensions of the image, not the file size. — WWDC 2018
The formula to calculate the memory footprint to display an image is:
memory footprint = width dimension * height dimension * 4 bytes
So, if I have a 5MB image (6000x4000px), the memory footprint for decoding and displaying that image will be 96MB.
Displaying the 6000x4000 px image in a 300x200 UIImageView is a huge waste of memory. In WWDC 2018, Apple introduced the Downsampling technique to resize the image before showing it on screen, which can reduce memory consumption drastically.
Here are some good articles about how to apply Downsampling from swiftsenpai and Kseniia Zozulia 👍
Automate it!
How can we know if we’re wasting unnecessary memory on displaying a big image? The manual approach is we will need to compare the image size with the image view’s frame.
Yes, we all hate doing tedious things manually 🥵
A simple automated approach is to create a subclass of UIImageView. Whenever we use an image that is bigger than the frame of the UIImageView, we can show a warning image on the image view.
Here is an example version of the approach:
final class CustomImageView: UIImageView {
var warning: UIImageView? var blurBackground: UIVisualEffectView?
override var image: UIImage? { didSet { super.image = image
// If in Debug and the image is too big, show a warning on top of the image view.#if DEBUG if isImageTooLarge { if warning != nil { return } let blurBackground = UIVisualEffectView(effect: UIBlurEffect(style: .systemUltraThinMaterial)) addSubview(blurBackground) blurBackground.frame = bounds blurBackground.alpha = 0.7 self.blurBackground = blurBackground
let warning = UIImageView(image: UIImage(systemName: "exclamationmark.triangle")) warning.tintColor = .red warning.translatesAutoresizingMaskIntoConstraints = false addSubview(warning) NSLayoutConstraint.activate([ warning.centerXAnchor.constraint(equalTo: centerXAnchor), warning.centerYAnchor.constraint(equalTo: centerYAnchor) ]) self.warning = warning } else { warning?.removeFromSuperview() warning = nil } }#endif }
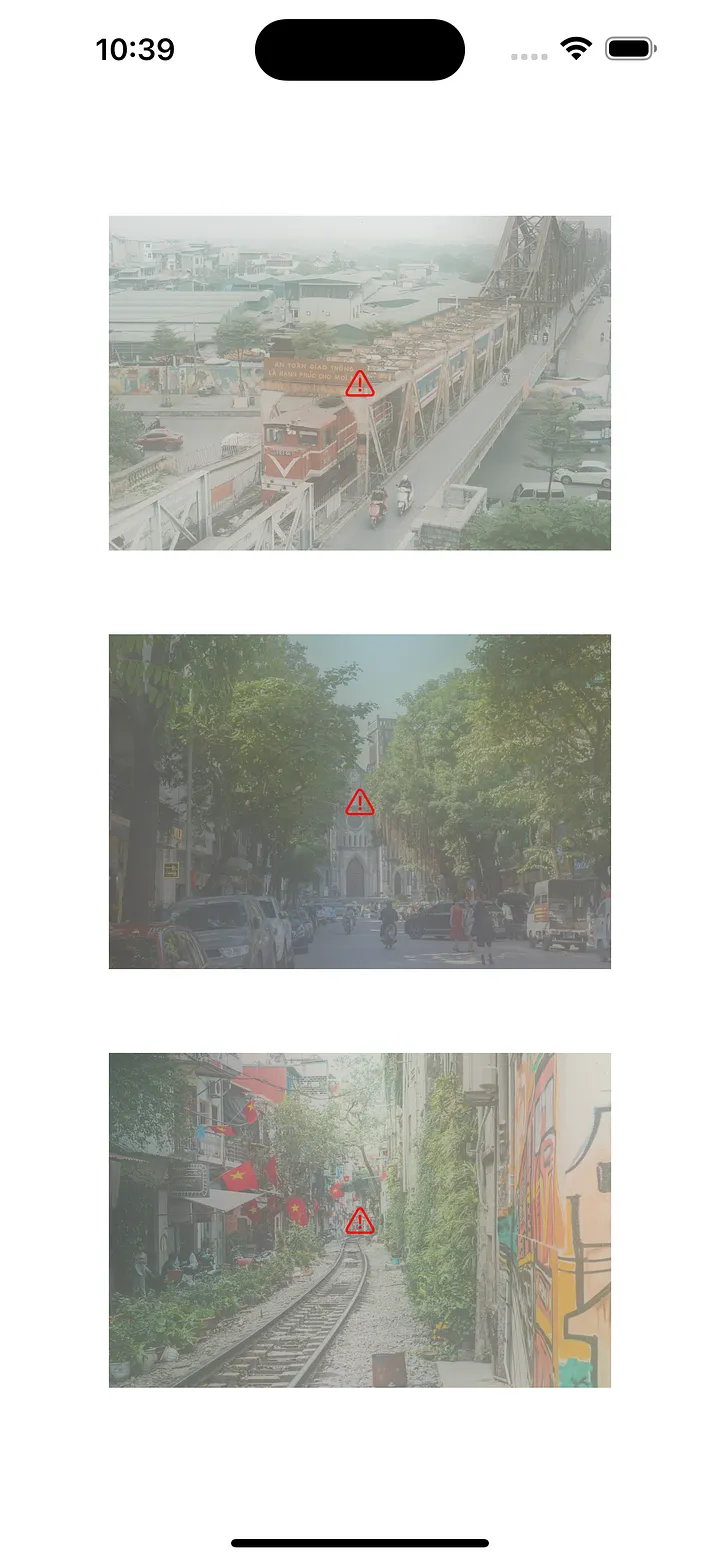
// Check if the image is bigger than the image view's frame private var isImageTooLarge: Bool { guard let image = image else { return false } return image.size.height * image.size.width > self.frame.height * self.frame.width }}Here is what it looks like if we use inappropriate image size. The engineer can notice it right away. They can then apply the downsampling technique to adjust the image 👏
Suggestions:
- Support fetch image with the specific size, ex:
https://{PATH_TO_IMAGE}/{IMAGE_ID}/{size}.jpg - Use the Downsampling technique to adjust the image size.
4. Remove Duplicate images
#4. Remove all the duplicated images in the project
In a big project, different engineers are working on various feature teams. A scenario they often face is having duplicated images across the project. It will increase the app size, and maintaining the images manually is a tedious and time-consuming process.
Our team has automated the process of checking duplicated images. We created a Python script to scan all the images in the project and compare them for duplication. Furthermore, we integrated this script into our CI workflow to check occasionally, and then send the report to the team.
Suggestion:
There are some open-source Python projects on GitHub to detect duplicate images, ex this project. You can download and integrate to your project seamlessly.
5. Remove unused images
#5. Remove all the unused images in the project.
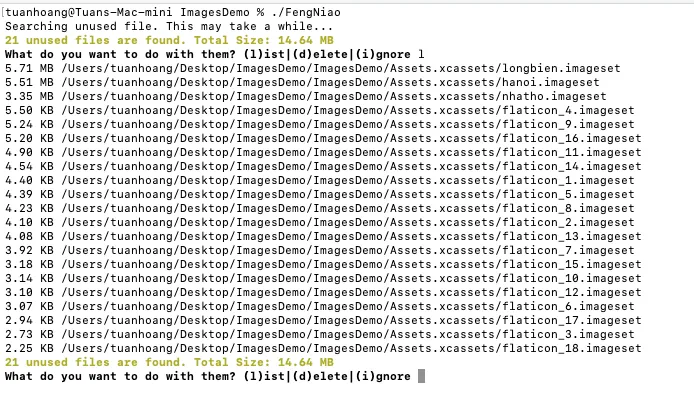
Similar to duplicated images, unused images increase the app size unnecessarily, so we should remove them. FengNiao is an open-source tool to help you detect and remove unused images:
Suggestion:
- You can integrate this tool into our CI workflow, and send a Slack notification to the team when there are any unused images. The team will double-check and remove the images manually if needed.
Conclusion
By putting some extra effort into managing image resources, we can improve our app’s performance effectively.
If you’re using any other tips to manage the assets, don’t hesitate to leave a comment :D